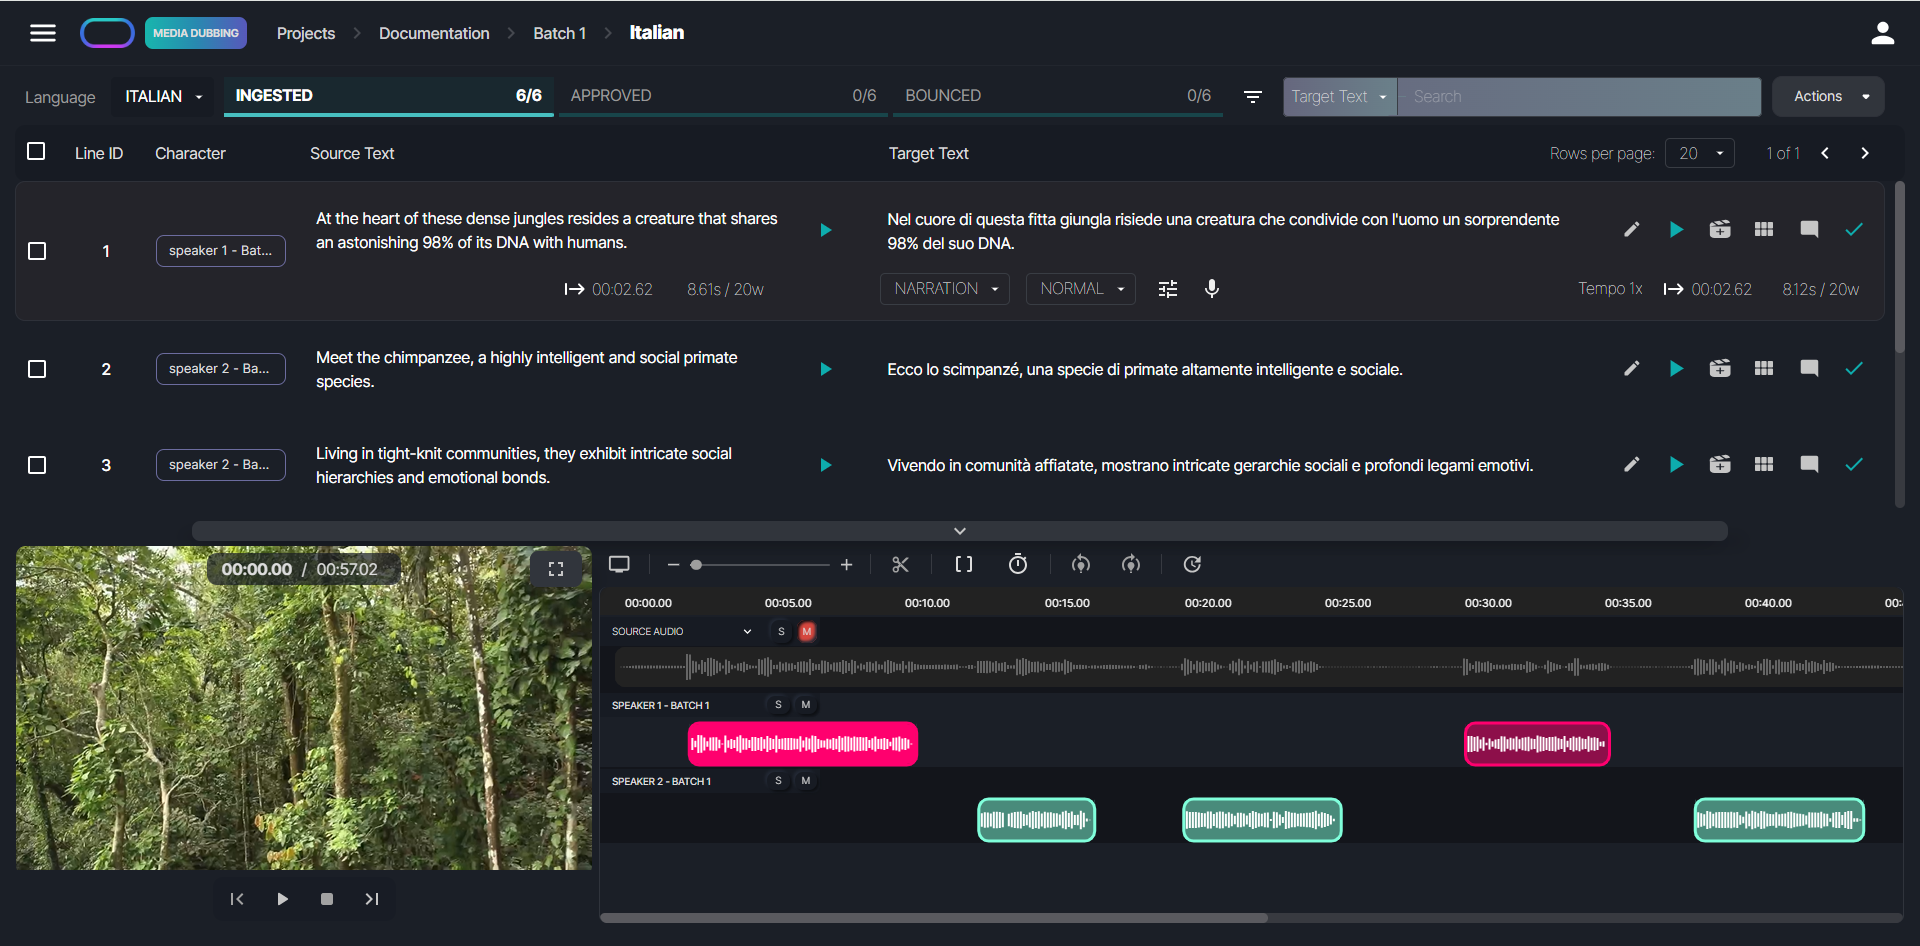
Ingested View
This page displays the script uploaded during batch creation, splitted into segments. The Preview Editor shows one target language at a time, and you can switch between target languages by clicking on the Language dropdown menu at the top left.
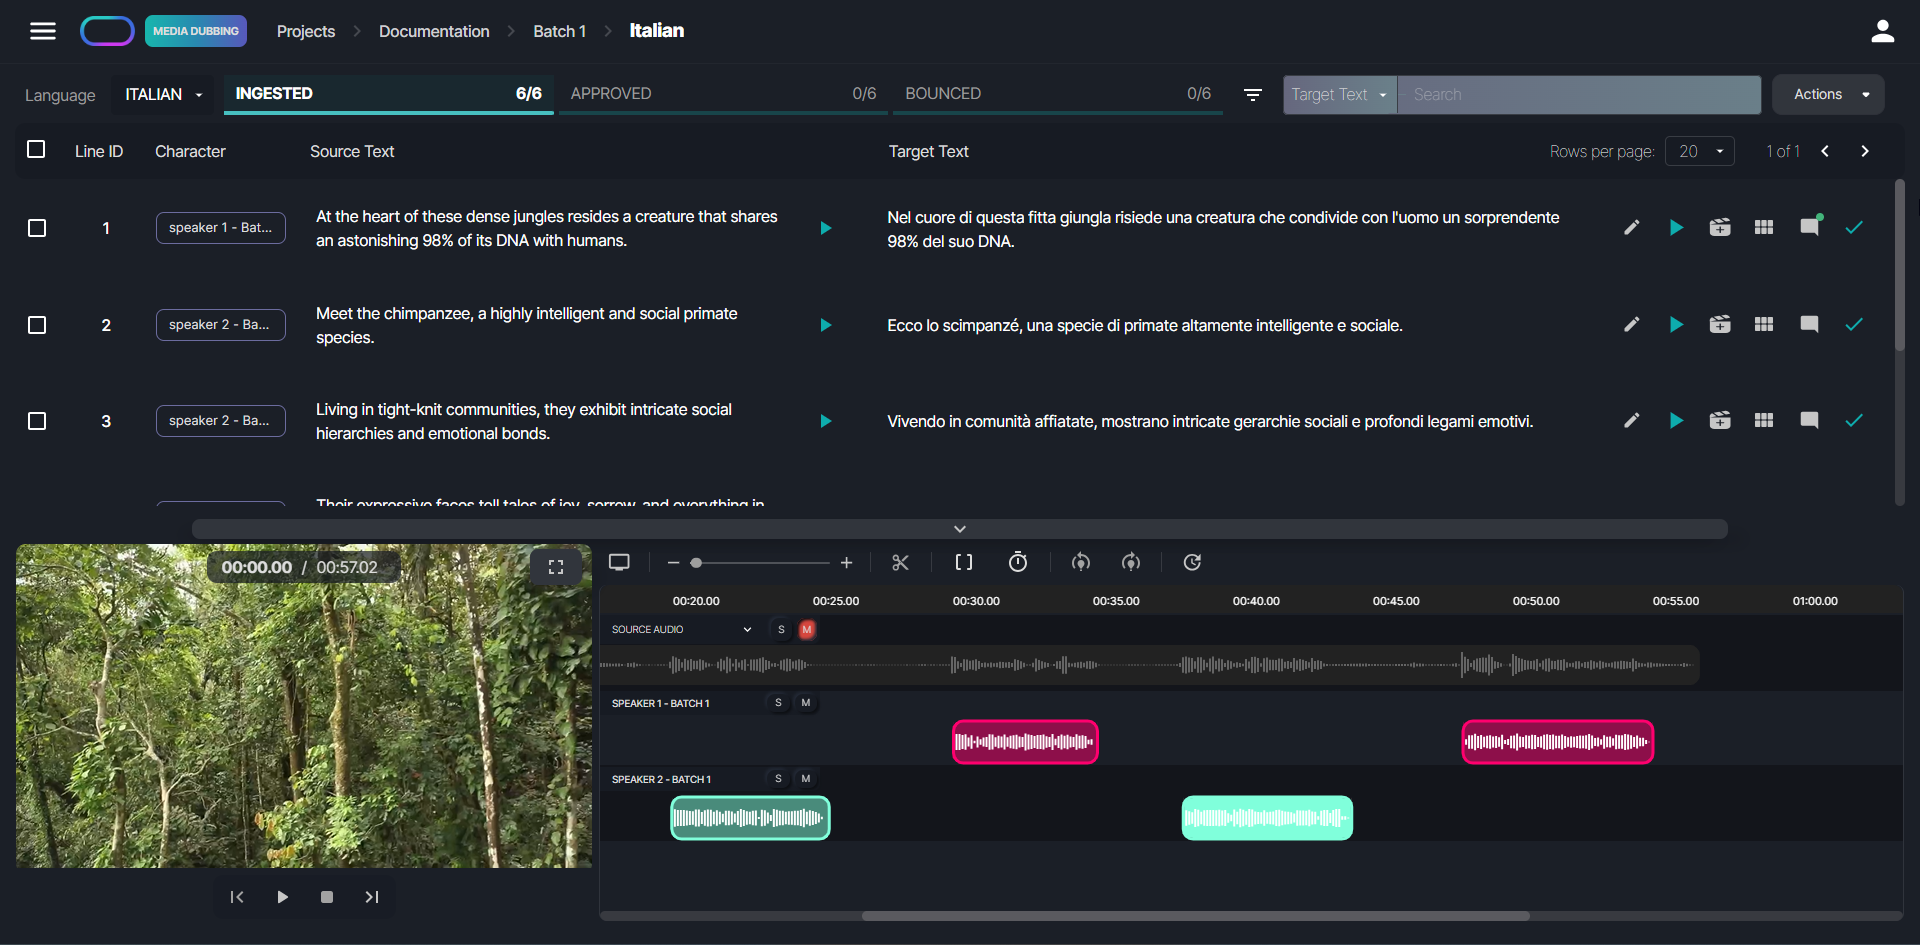
The segments display the text for each line, along with various controls for content review. At the bottom, you can expand the Timeline, which, if a video was uploaded during asset ingestion, displays the video on the left and the source and target audio tracks on the right.
When creating a batch, you can choose to generate up to three takes for each line of the script. To view alternative takes, simply click the  button.
Here's how alternative takes are displayed:
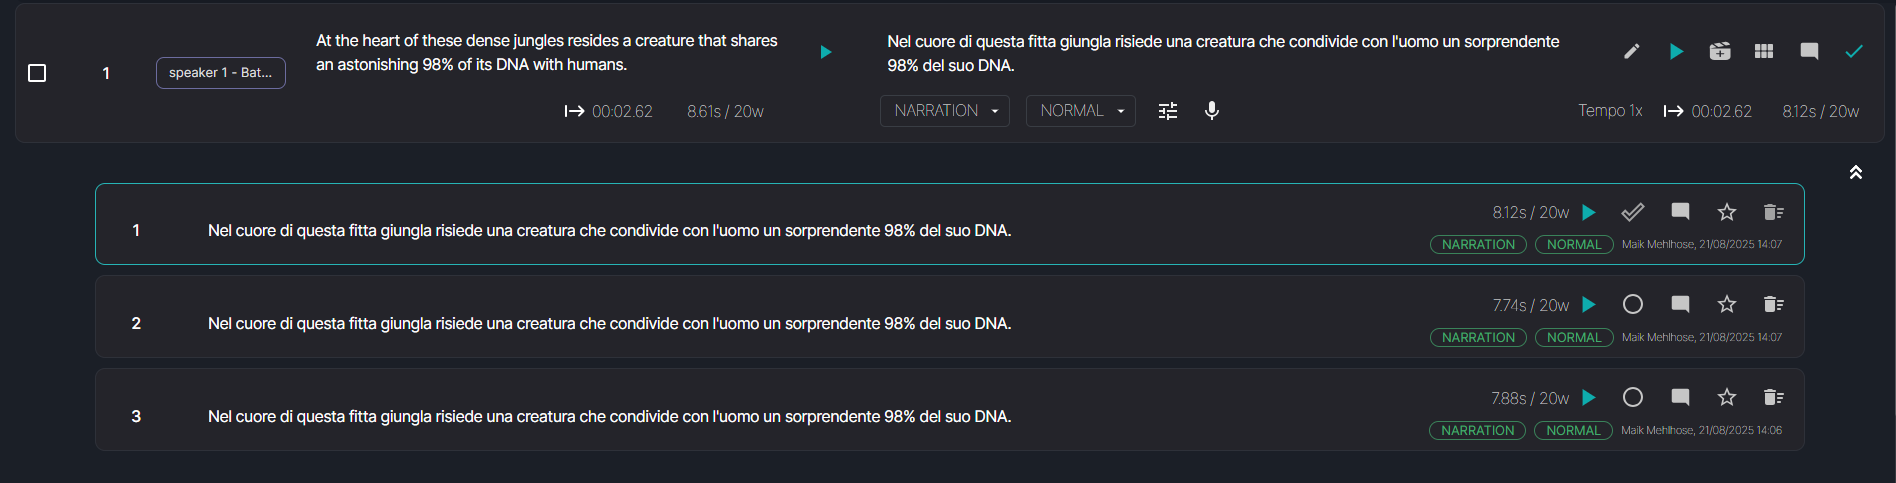
As shown in the screenshot above, the Alternative Takes view allows you to display details of the most recent edit for each take, including the username and a timestamp. When you open a history, you can expand the timeline. From there, you can use the Chop/Merge feature to combine the best parts of different takes: add a region to the timeline, adjust its boundaries, then repeat with other takes to merge them into one clean audio file.

You can add Comments to a take by clicking the  button, as shown in the screenshot below.

Takes with comments are indicated by a green dot in the top right corner of the Comments button.
Here is a list of the editing and review options available on this page:
Text Editor
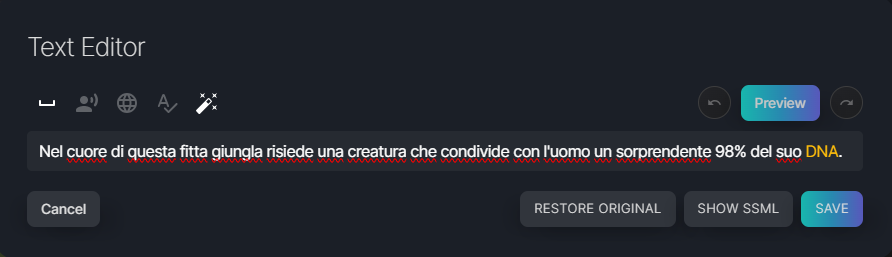
You can edit the target text by clicking on the  button. The following window will be displayed:
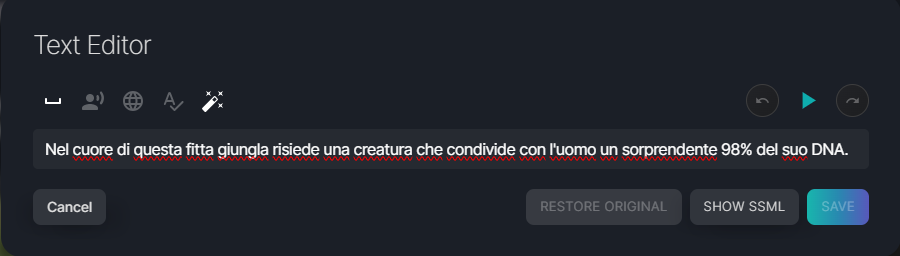
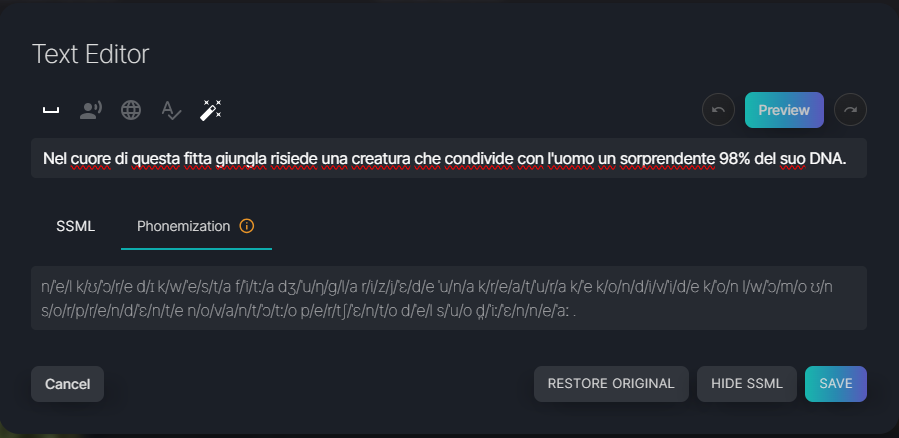
Here you can make changes to the target text, listen to the audio preview, undo/redo changes, and restore the original text. Furthermore, by clicking on Show SSML, you can view the target text with SSML tags, display the phonemization of individual terms inside the sentence, and copy/paste a specific phonemization into the Edit Phonemization box.
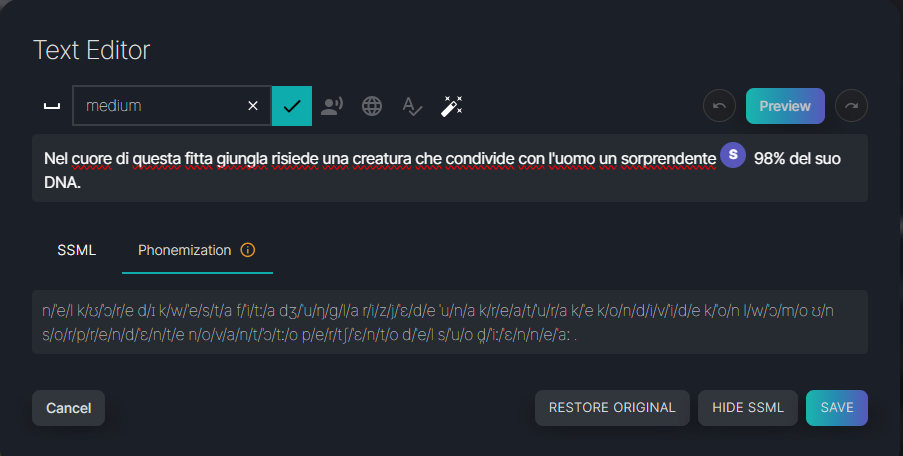
Insert Pauses
To insert pauses, place the cursor at the desired position in the text. Then, click the pause icon and choose a pause length – short, medium, or long. Finish the placement by clicking the confirmation icon.
Pronunciaton Control
In the Text Editor, you can also adjust and set the correct pronunciation of foreign and made-up terms in the target language. There are three options for pronunciation control:
 Pronounce As
This option enables you to input how a specific word should be pronounced. Select the word, click on the button to open the Pronounce As box, and write how you want that specific word to be pronounced, as in the following example. This is particularly useful for acronyms, or made-up terms that don't exist in any language.
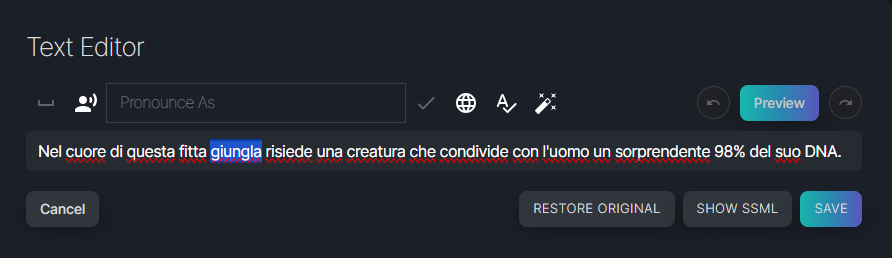
Then click the confirmation button to complete the action.
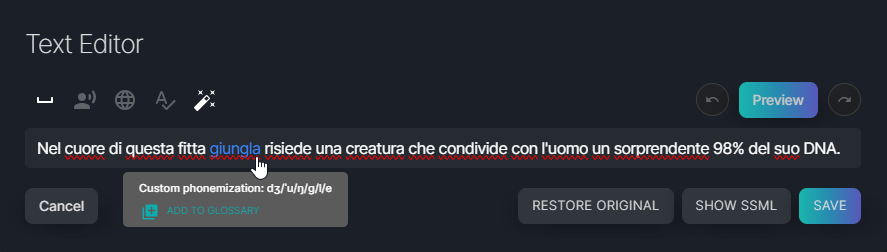
If you hover over the term with the edited pronunciation, the Add to Glossary button will appear, allowing you to directly add that term with the relevant pronunciation to the glossary.
Listen to the audio preview by clicking on the Preview button. When you're happy with the result, click on Save.
 Edit Phonemization Language
This option allows you to choose the phonemization and pronunciation language from the available target languages. This is particularly useful for terms which have a set pronunciation in a foreign langugae. Click on the button to open the Custom Phonemization Language and Custom Pronunciation Language dropdown menus and select the phonemization and pronunciation language from the available options.

Then click the confirmation button to complete the action.
If you hover over the term with the edited pronunciation, the Add to Glossary button will appear, allowing you to directly add that term with the relevant pronunciation to the glossary.
Listen to the audio preview by clicking on the Preview button. When you're happy with the result, click on Save.
 Custom Phonemization
This option allows you to set the specific phonemization of a selected term using International Phonetic Alphabet (IPA) symbols and to select the accent you want to apply to that term. Click on the button to open the Pronunciation Language dropdown menu to choose the accent you want to apply to the term, and the Custom Phonemization box to enter the phonemization as in the following example. You can also use the phonemization available under Show SSML > Phonemization for reference.
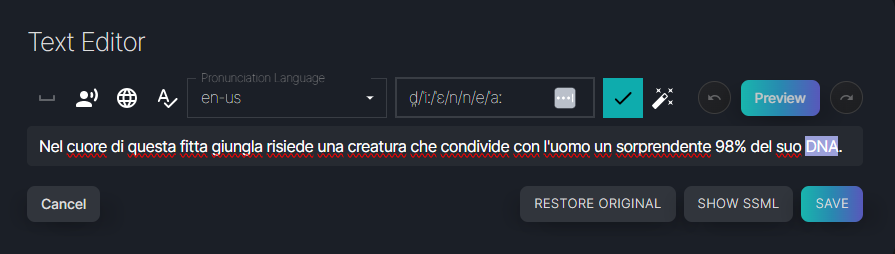
Then click the confirmation button to complete the action.
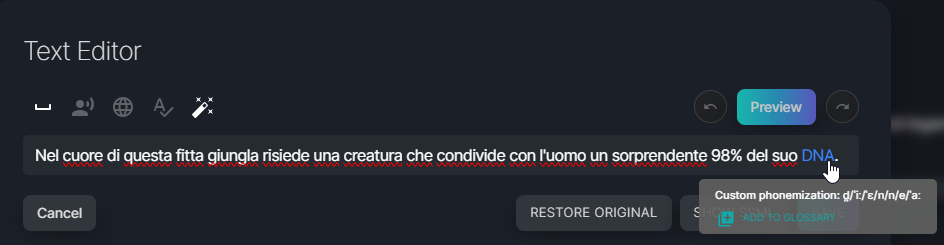
If you hover over the term with the edited pronunciation, the Add to Glossary button will appear, allowing you to directly add that term with the relevant pronunciation to the glossary.
Listen to the audio preview by clicking on the Preview button. When you're happy with the result, click on Save.
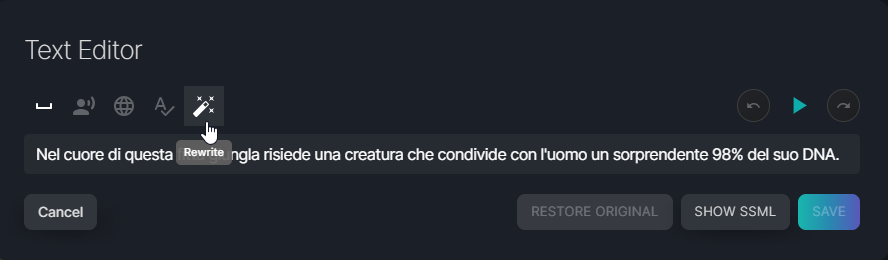
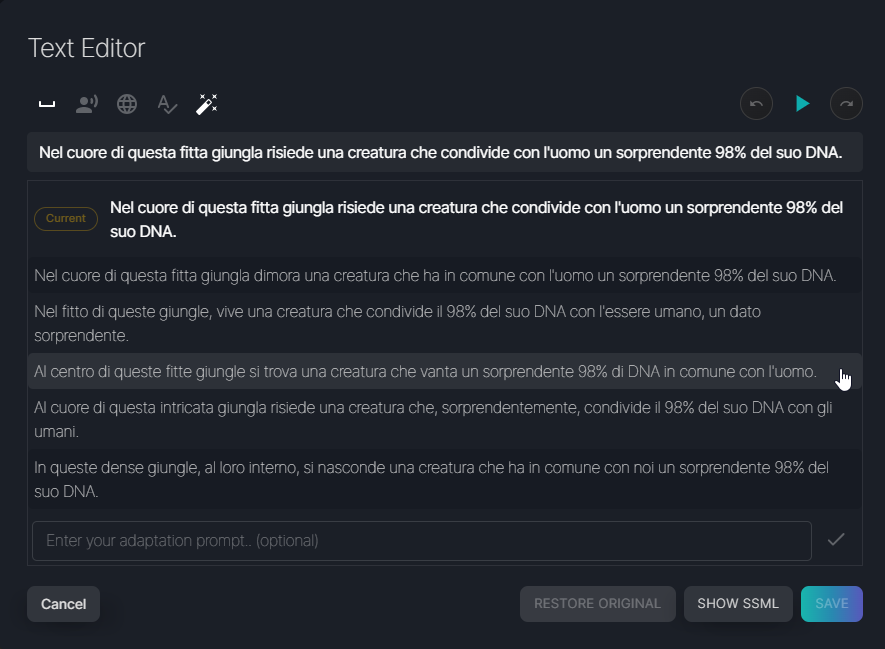
 Text Adaptation
The Text Adaptation feature sends the selected line to an LLM and returns five alternative formulations. The underlying prompt has been optimized for script lines. Click on the button to send the text and receive the LLM responses.
After running the process, five alternatives will be displayed. Select your preferred version, and then edit it directly in the text editor if needed. You can also provide an optional prompt to further refine the alternatives.
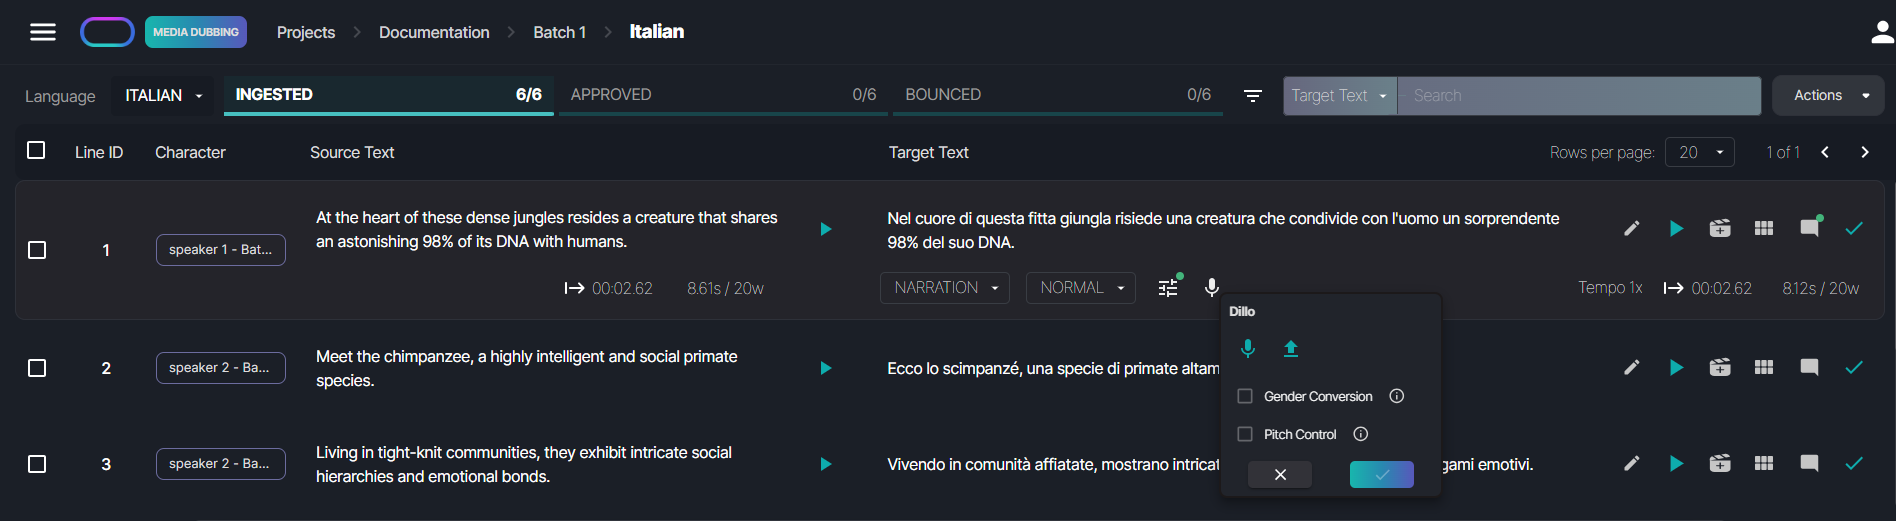
Dillo
With the Dillo feature, you can record your voice to guide the delivery of a line. The generated output will match the timing, prosody, and style of your recording. For the best results, use high-quality recording equipment in a quiet environment, as the system is sensitive to subtle background noise.
First, click the  button and then either record your voice or upload an audio file. Once your recording is ready, click the confirmation button to create your audio file.
Two additional options can be enabled:
Gender Conversion adapts your voice when the character has a voice of the opposite gender.
Pitch Control lets you adjust the pitch for a more customized audio output.
Tempo Rate Control
The Tempo Rate control allows you to adjust the reading pace of the delivered line, enabling you to make it slower or faster compared to the suggested pace. Here is how the control looks like:

To edit the tempo rate, click on the  button, input the percentage value, and confirm. Please note that to increase the speed, you should enter a negative value, while to decrease the speed, a positive value is required. In the following example, the reading pace will be 10% slower than the original.

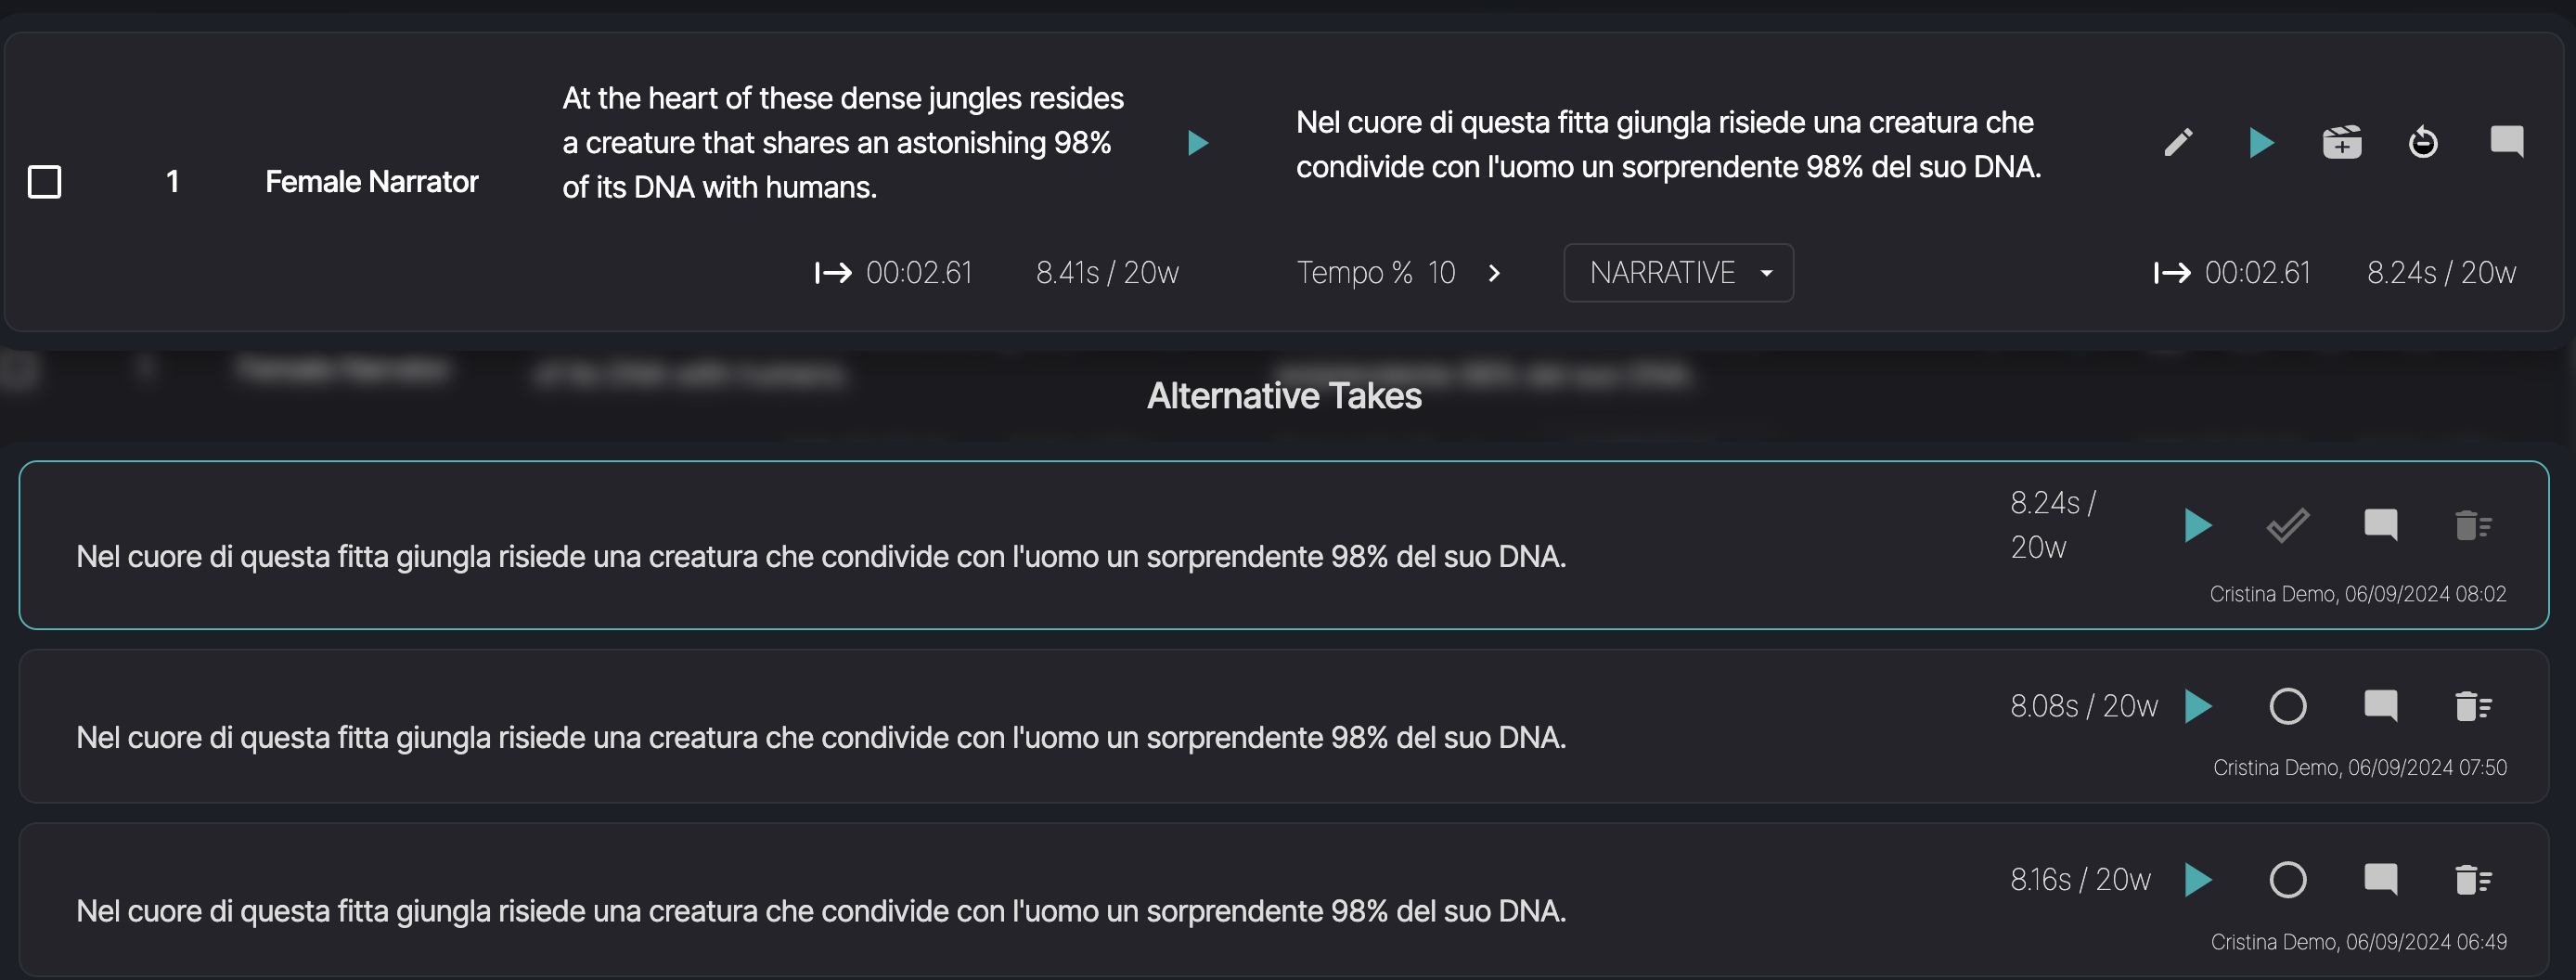
Generate Alternative Takes
You can generate alternative takes with varying prosody and reading pace for each line.
Simply click on the  button to run an inference and generate an alternative take.
To view the list of alternative takes generated for a line, click on the button to access the history of alternative takes. You can listen to them consecutively and select the most suitable option, as shown in the example below.
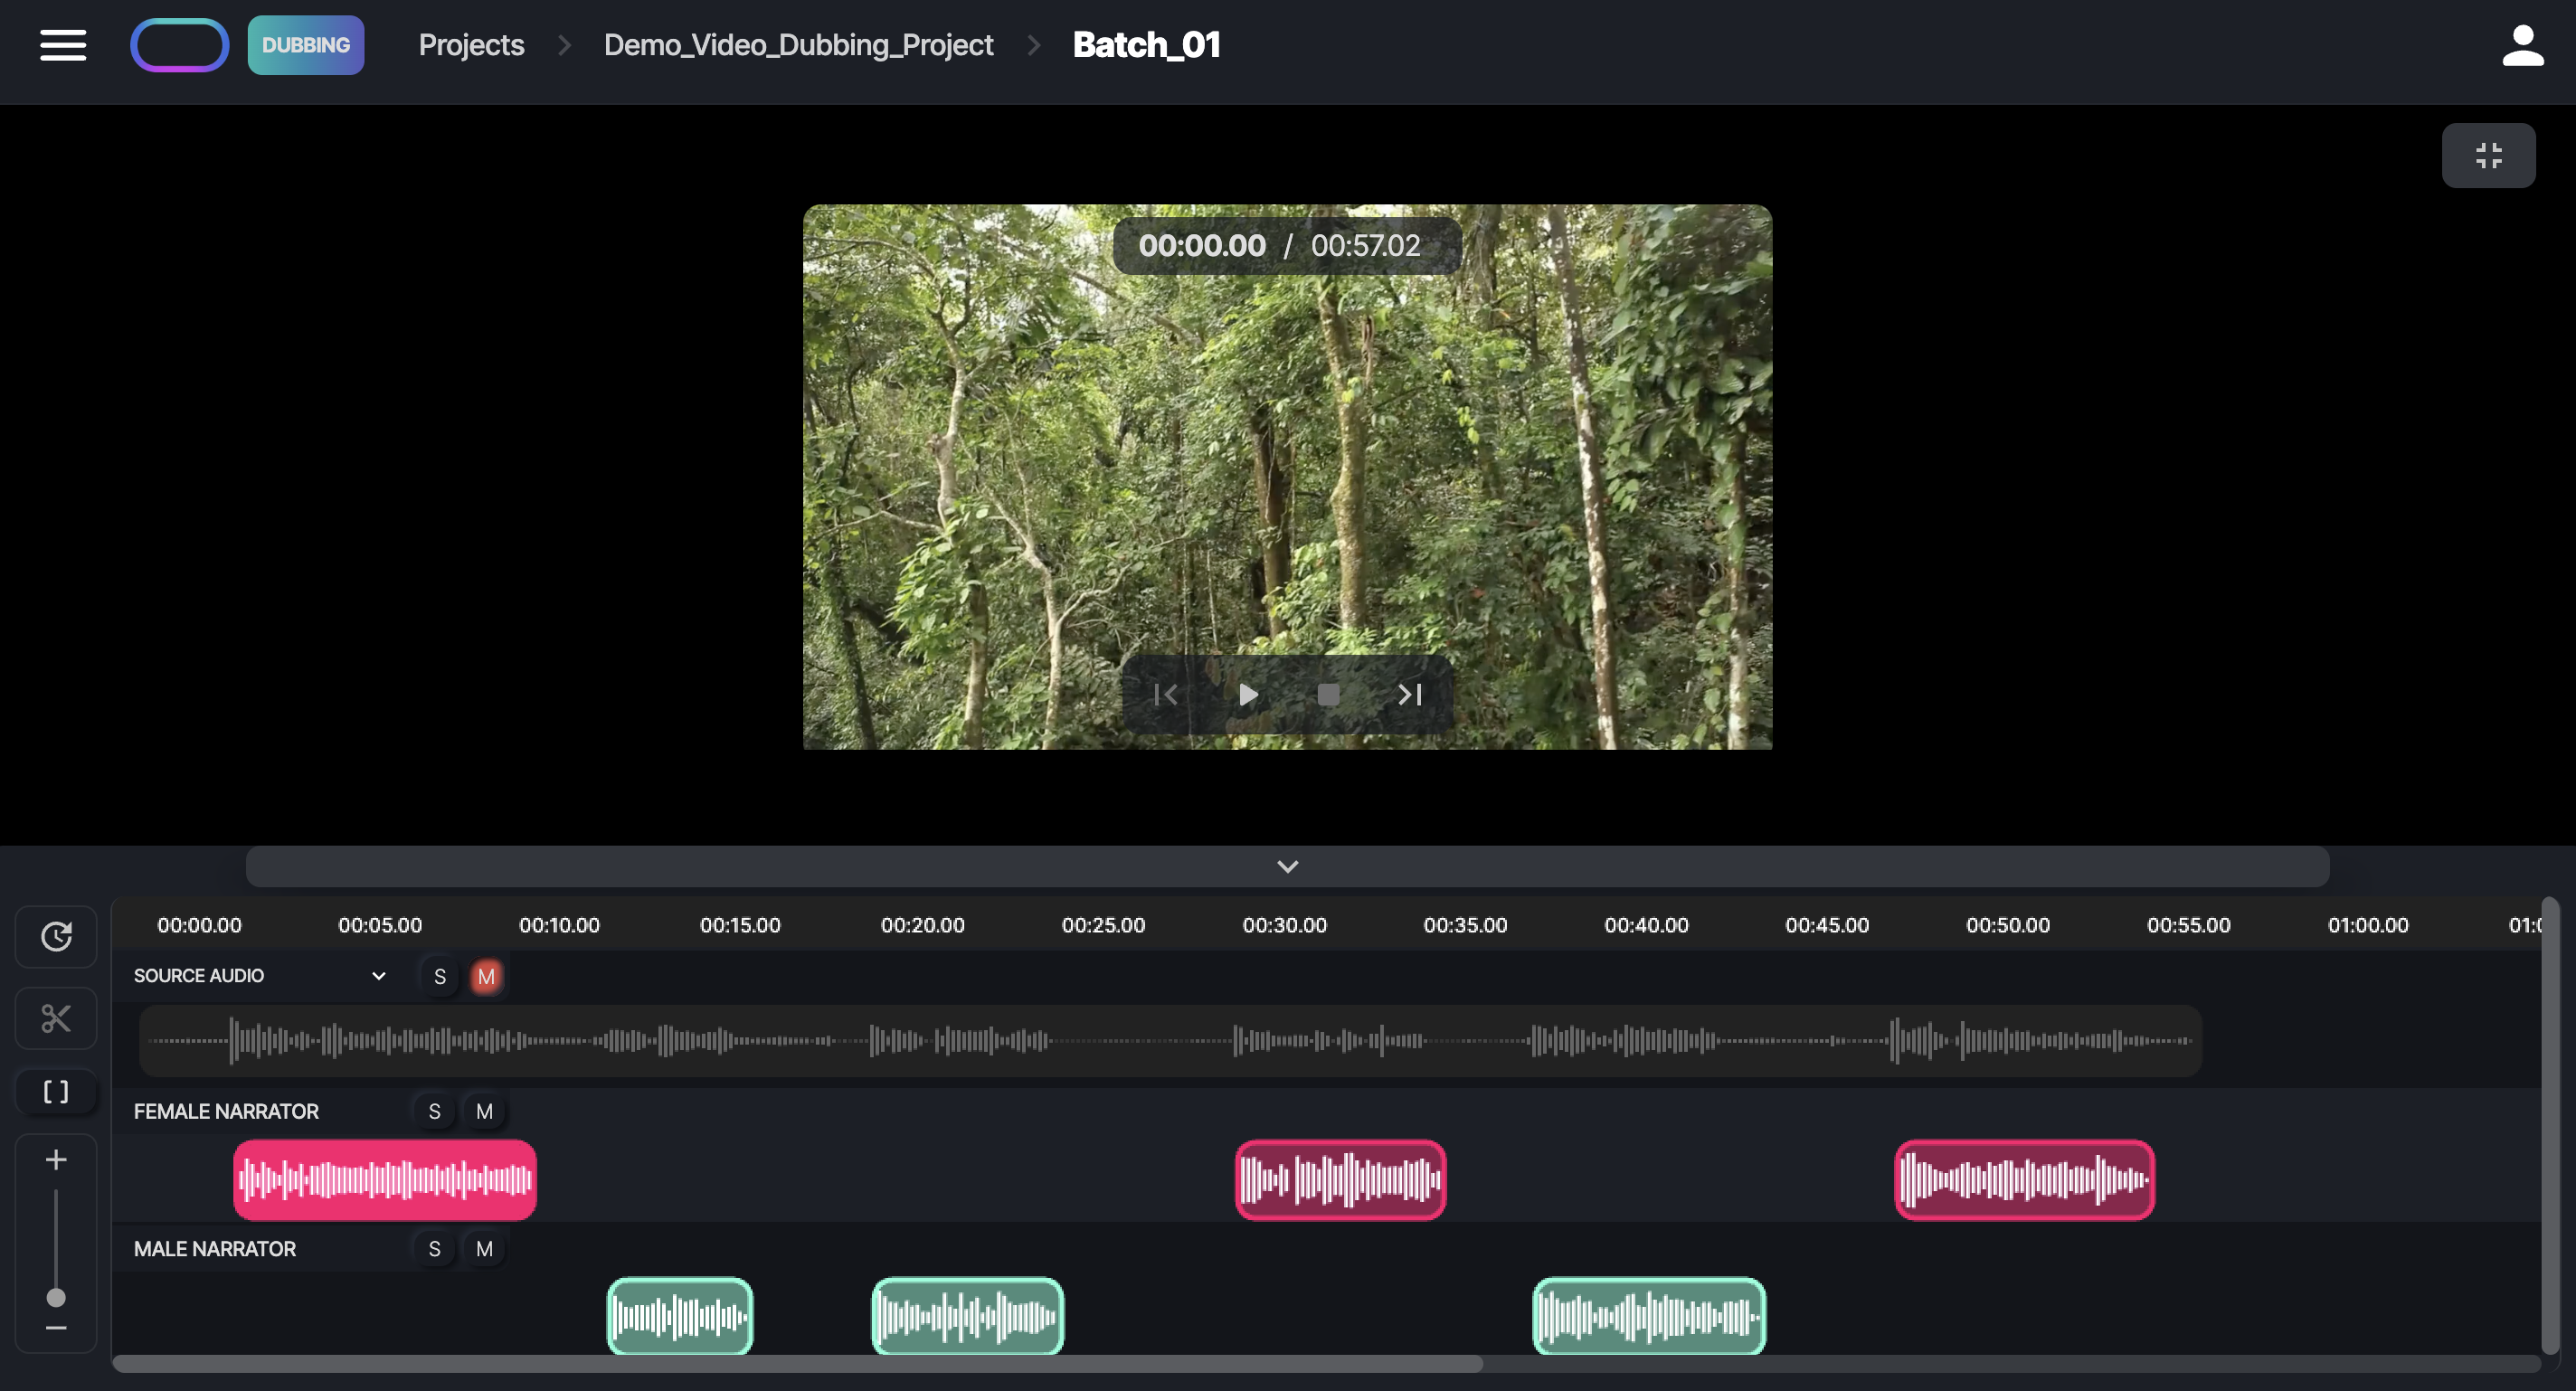
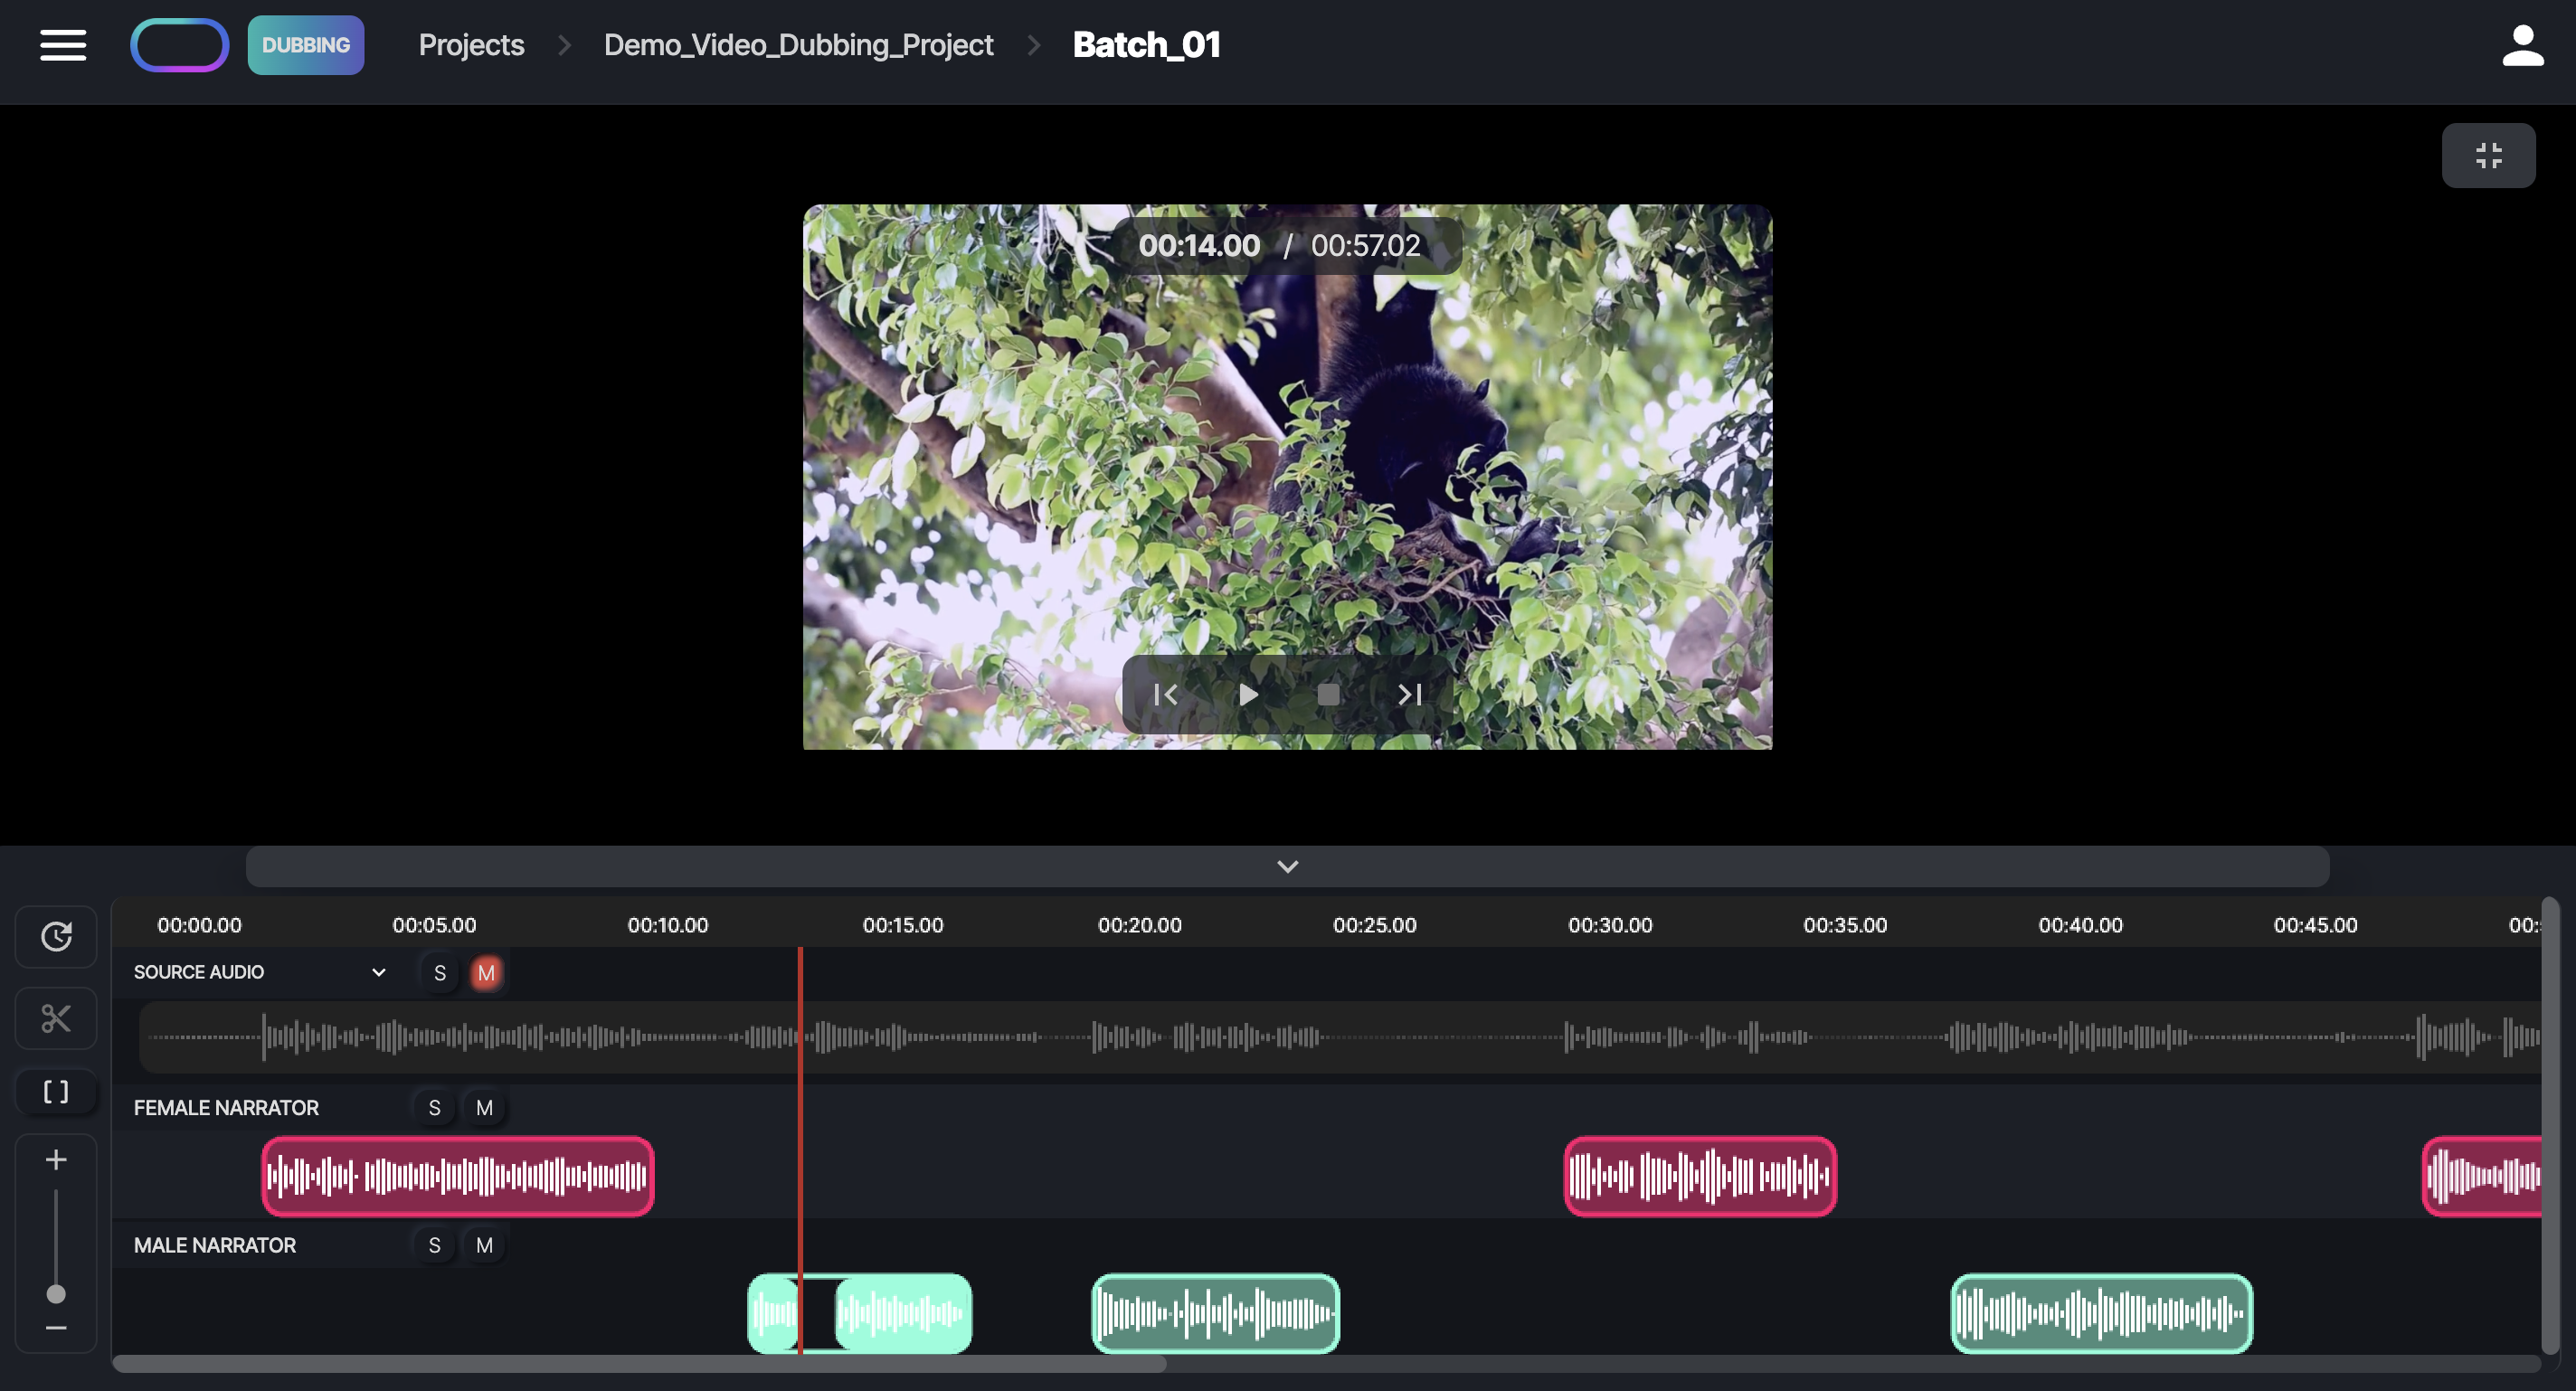
Video and Timeline
At the bottom of the page, you can expand and collapse the timeline, enabling you to display the video and to work on the entire target track. As you generate the target lines, the timeline is populated with individual target audio takes, all synchronized with the corresponding source takes. Additionally, if there are multiple characters in the script, each character will have a distinct track on the timeline, as shown in the example below:

When playing video/audio on the Preview page, the system automatically scrolls through the segments on the Timeline. Similarly, when you click on an audio segment, the Timeline jumps to the segment. When you select an inferred line in the Preview, the Timeline adjusts to display the corresponding audio segment.
You have the flexibility to adjust the position of each individual take within the timeline as per your requirements: simply press and hold the left mouse button on the individual audio segment, then drag it to the right or left. Additionally, you can shift multiple segments on the timeline together: hold down the Shift key, then press and hold the left mouse button on an audio segment.
Shift + Drag Right: Moves the selected segment and all segments to its right further to the right.
Shift + Drag Left: Moves the selected segment and all segments to its left further to the left, up to the point where the first segment reaches the starting time code of 00:00.00, beyond which no segments can move.
You can expand the video to full-screen mode and easily listen to the entire target track by clicking the Play button, as shown in the example below.
 Resync Timeline
To reset all changes to the timeline, simply click on the button to resync all target audio segments and automatically move them back to their original position (the start time of the source segments).
 Split Audio
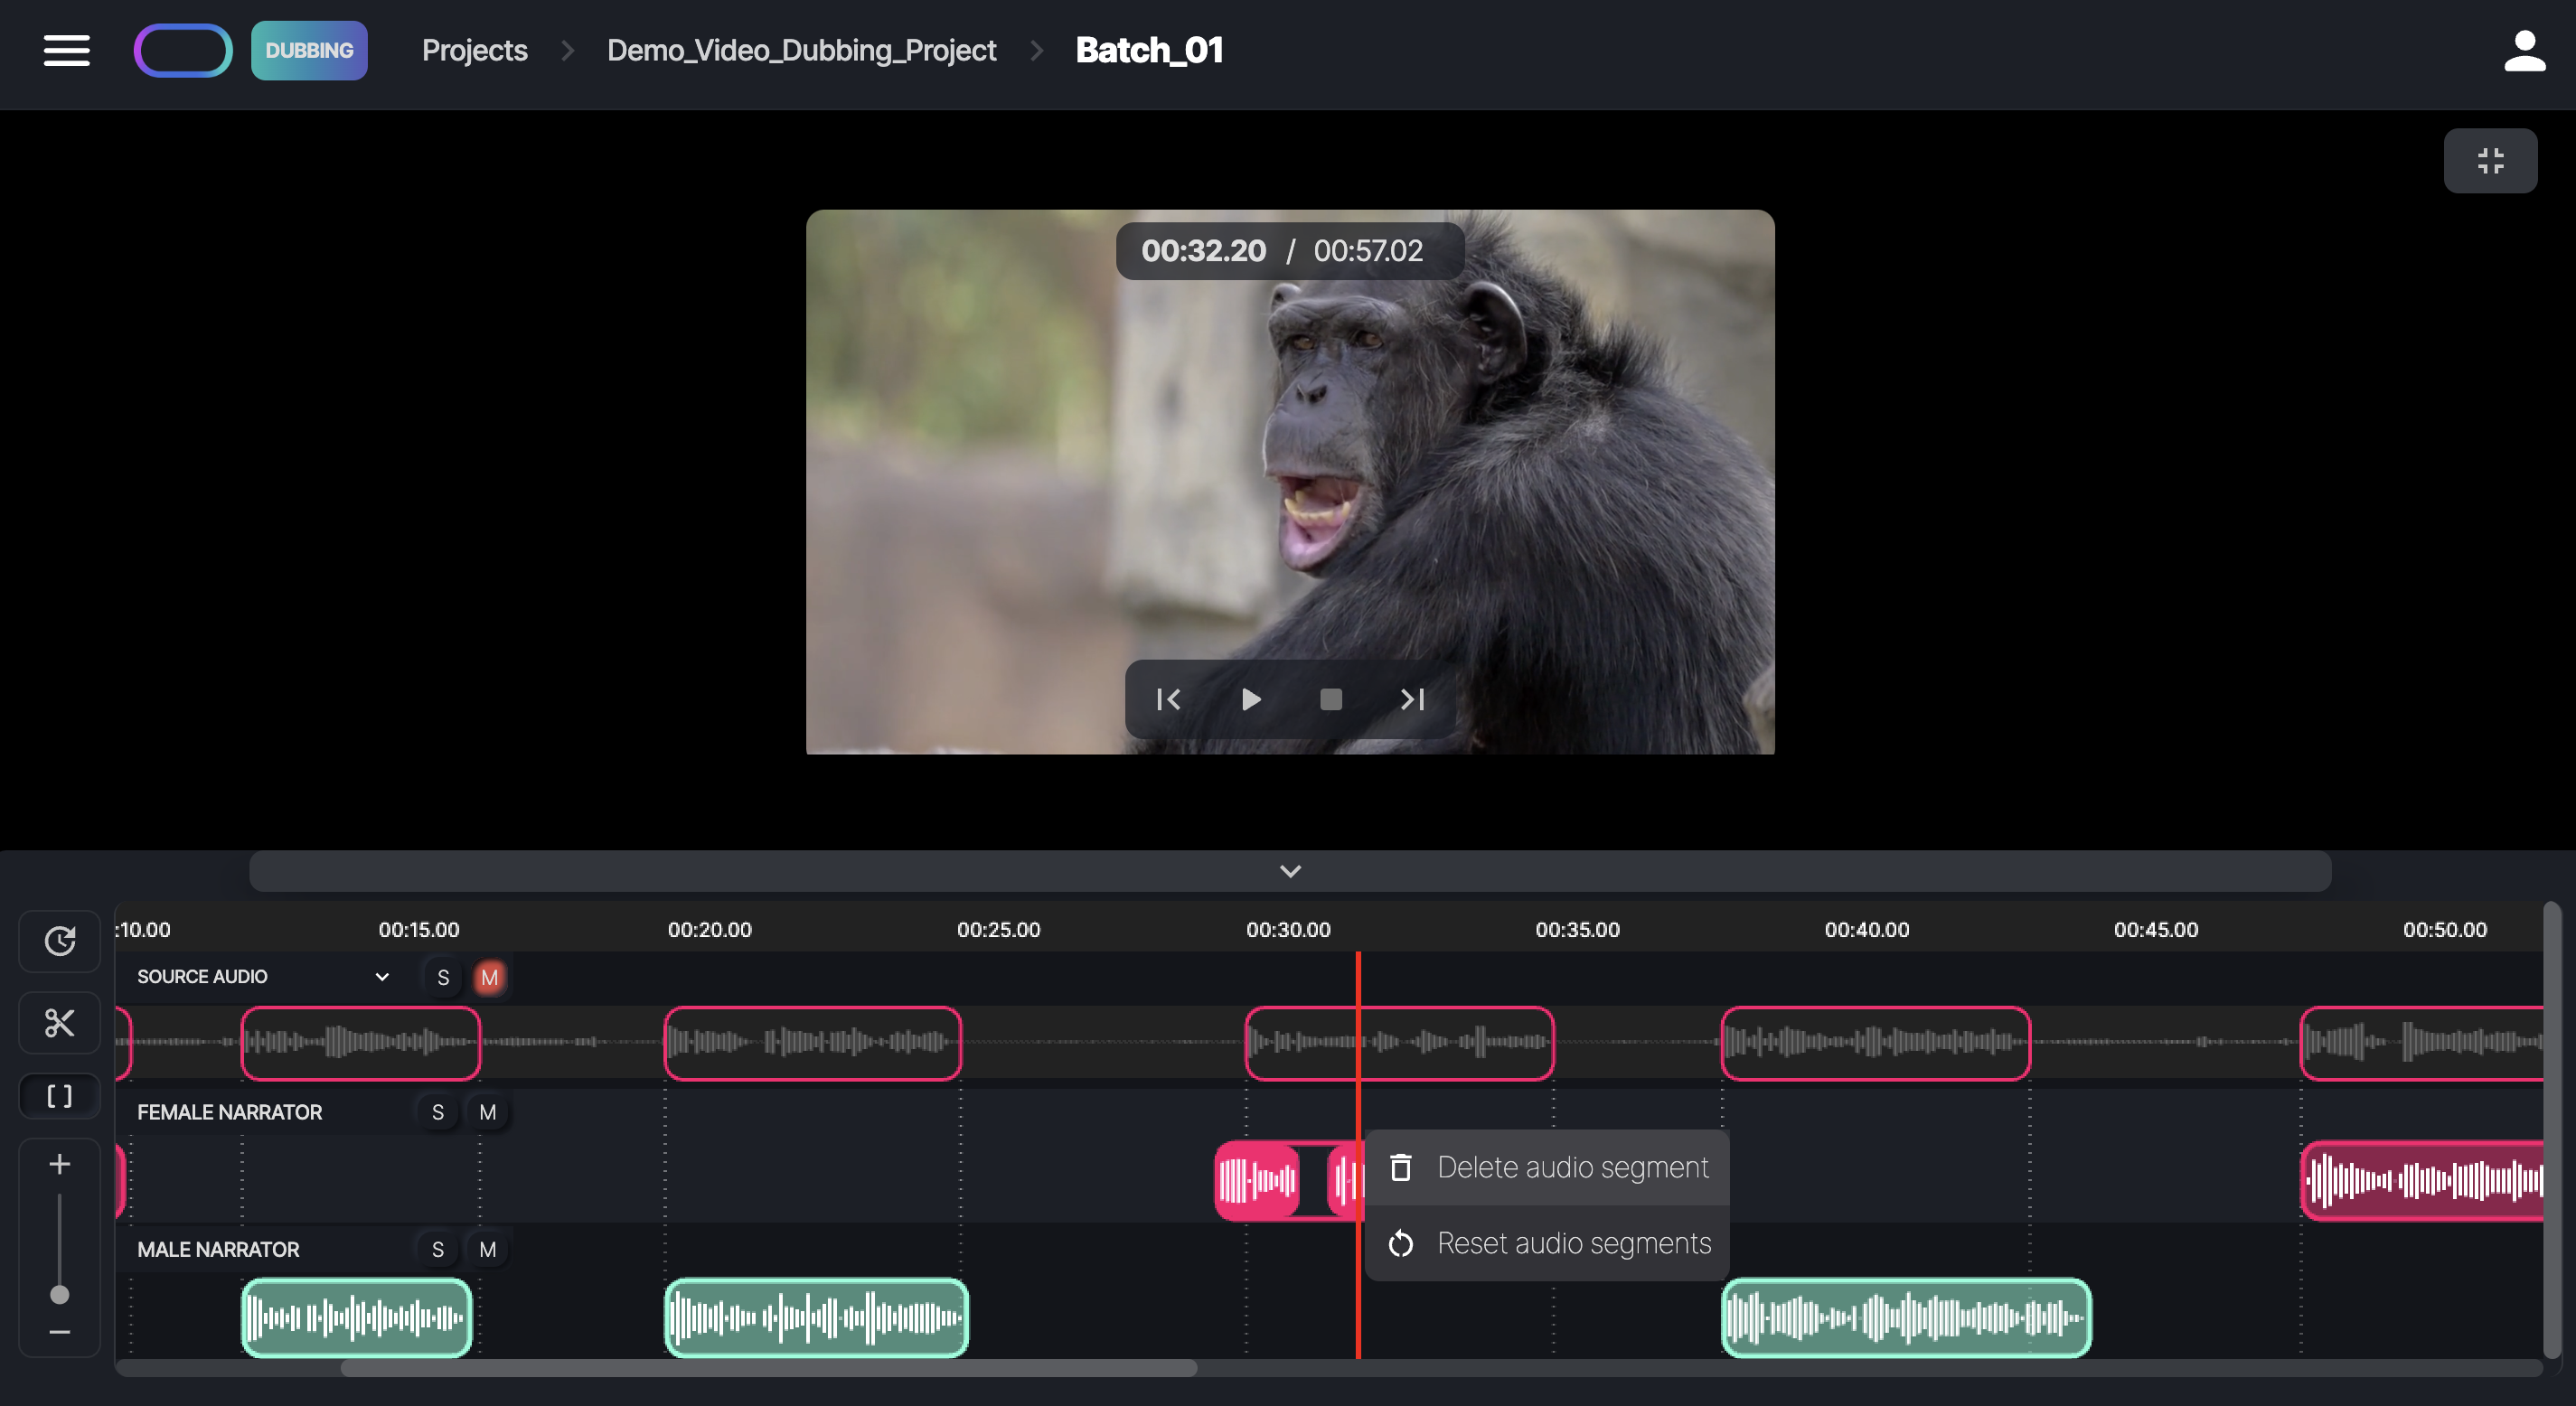
In the timeline you can also split the audio chunks to increase the internal pauses of a segment. Simply, place the cursor where you want to place a pause, and click on the button to cut the audio chunk at that specific point. Then, you will be able to move the sub-chunk as you prefer, as shown in the screenshot below.
To delete an audio sub-chunk, right-click on it and select the Delete audio segment option. You can also merge the sub-chunks back to their original position by either moving them closer together or right-clicking on the chunk and selecting Reset audio segments, as shown in the screenshot below.
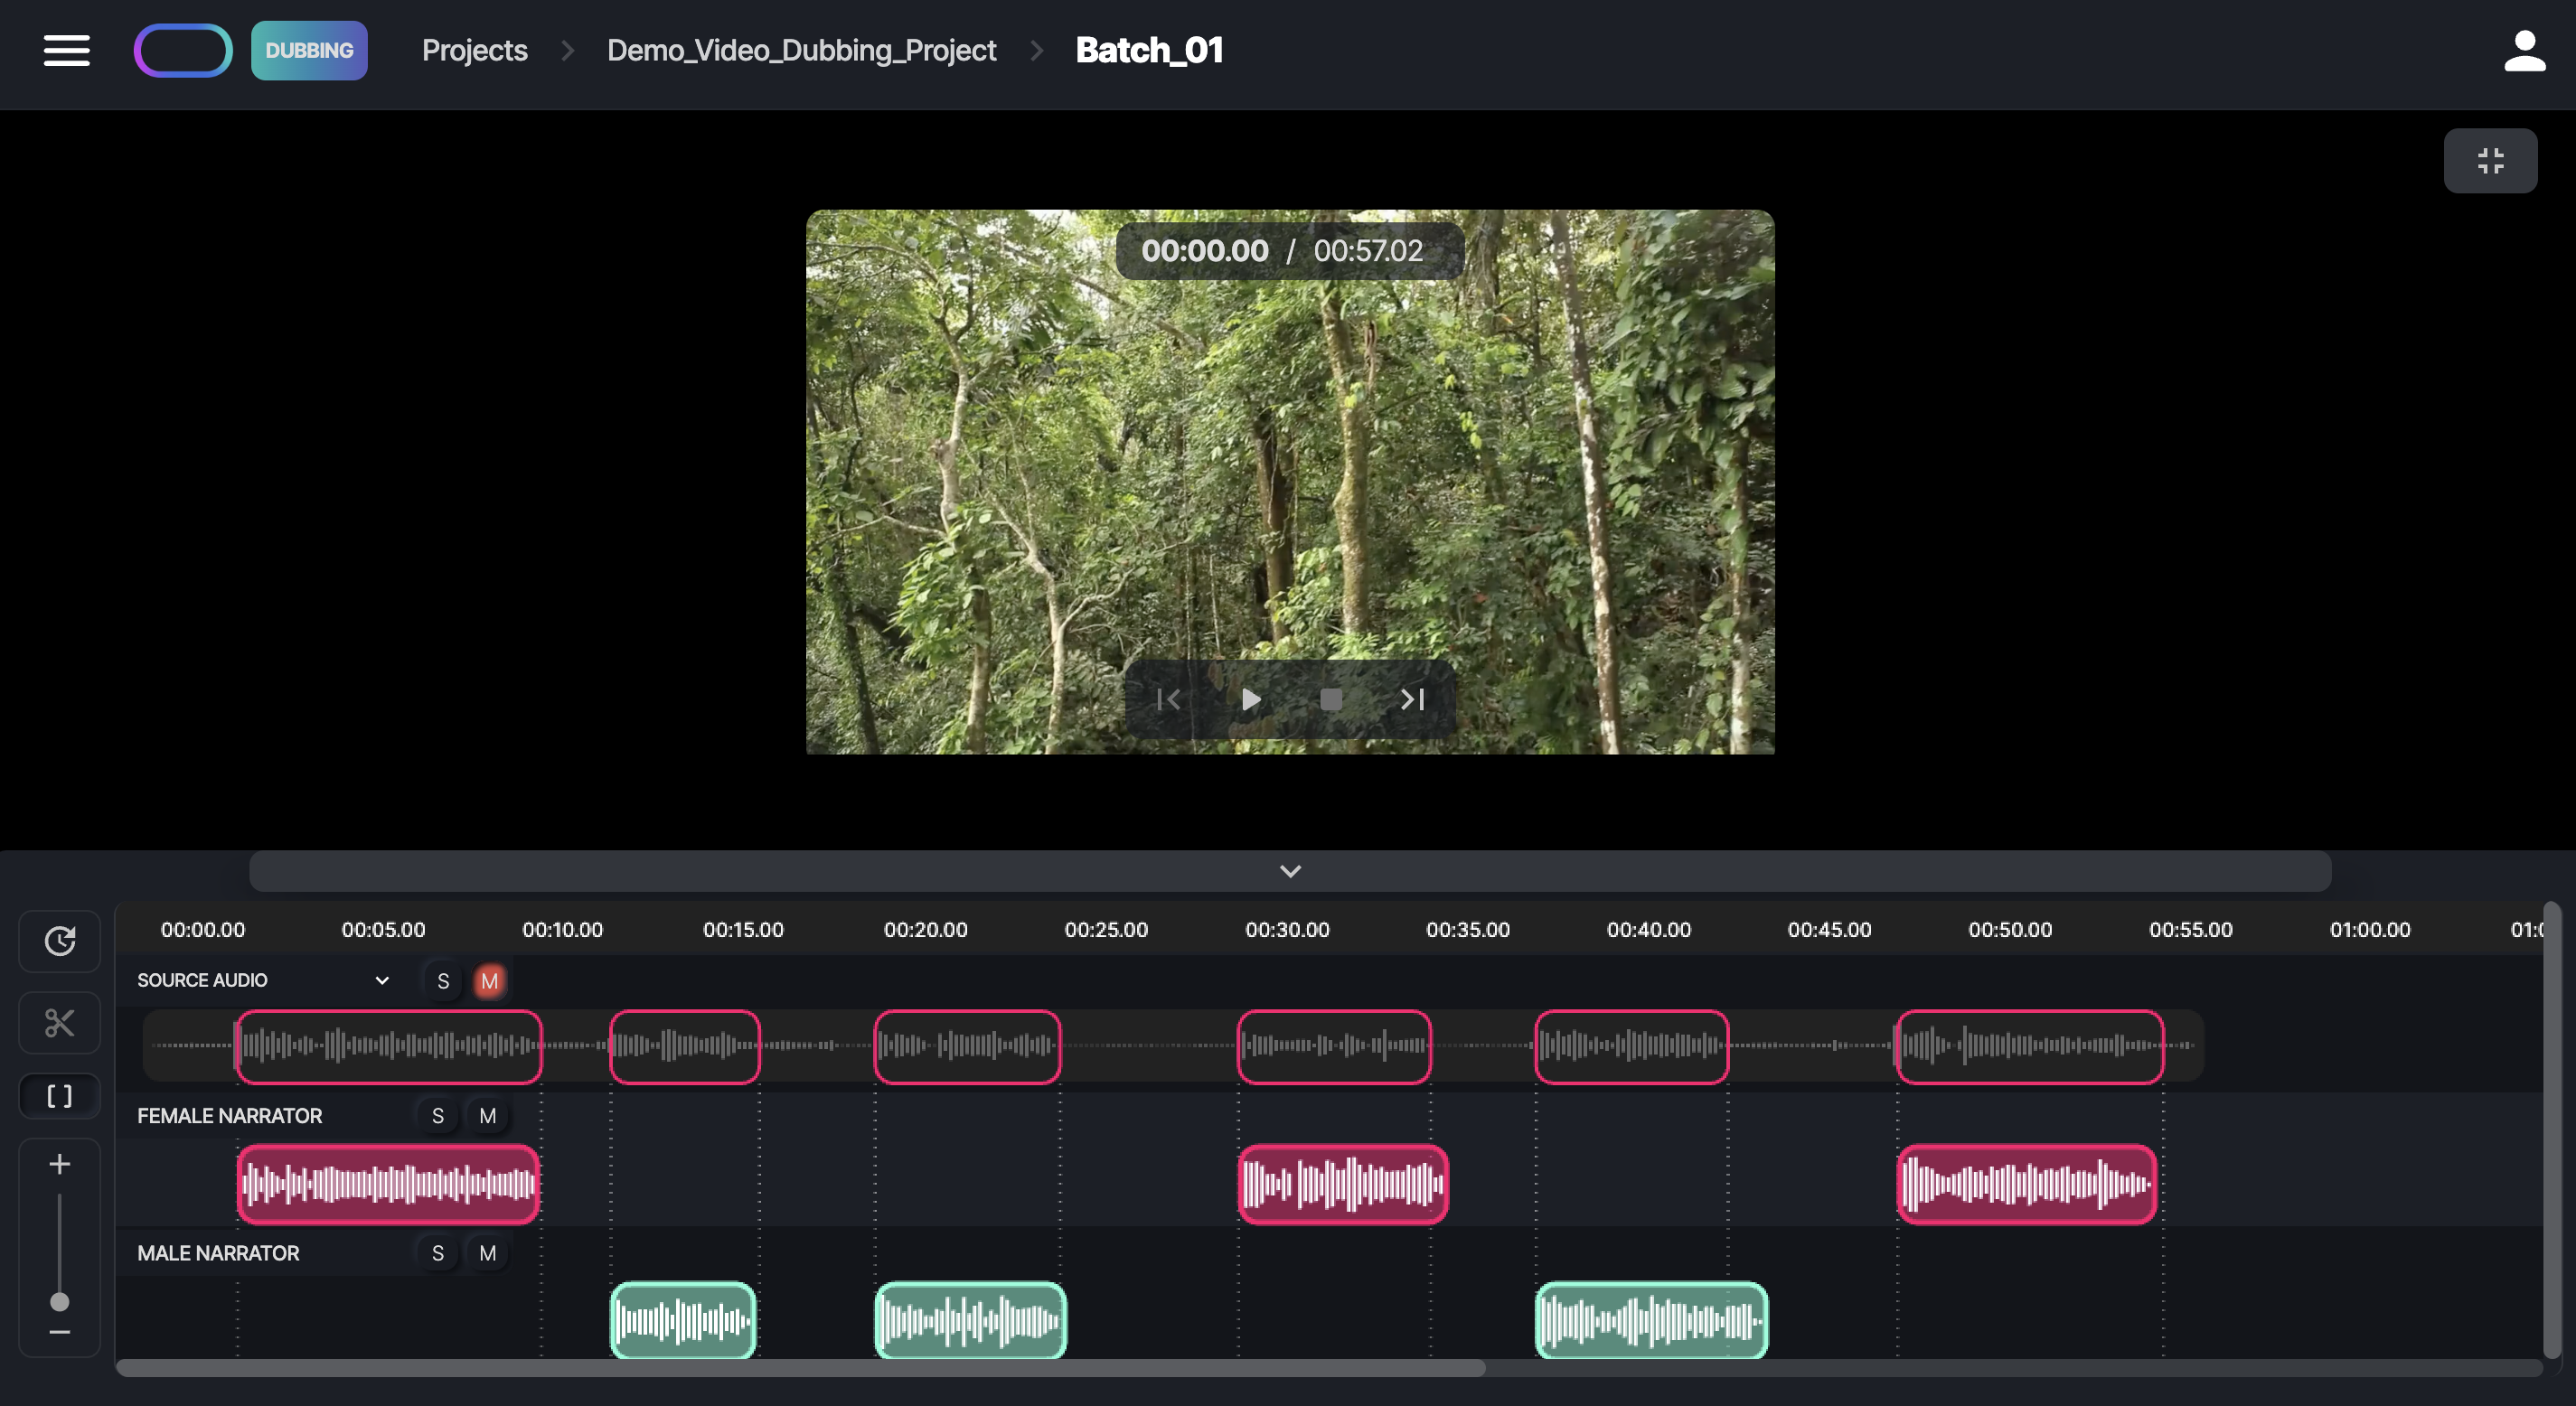
 Show Delimiters
In the timeline, you can enable vertical delimiters to enhance sound syncing. Just click the button to display the vertical delimiters and the borders of the source audio chunks, as shown in the screenshot below. Use the Show Delimiters button to toggle the delimiters on or off.
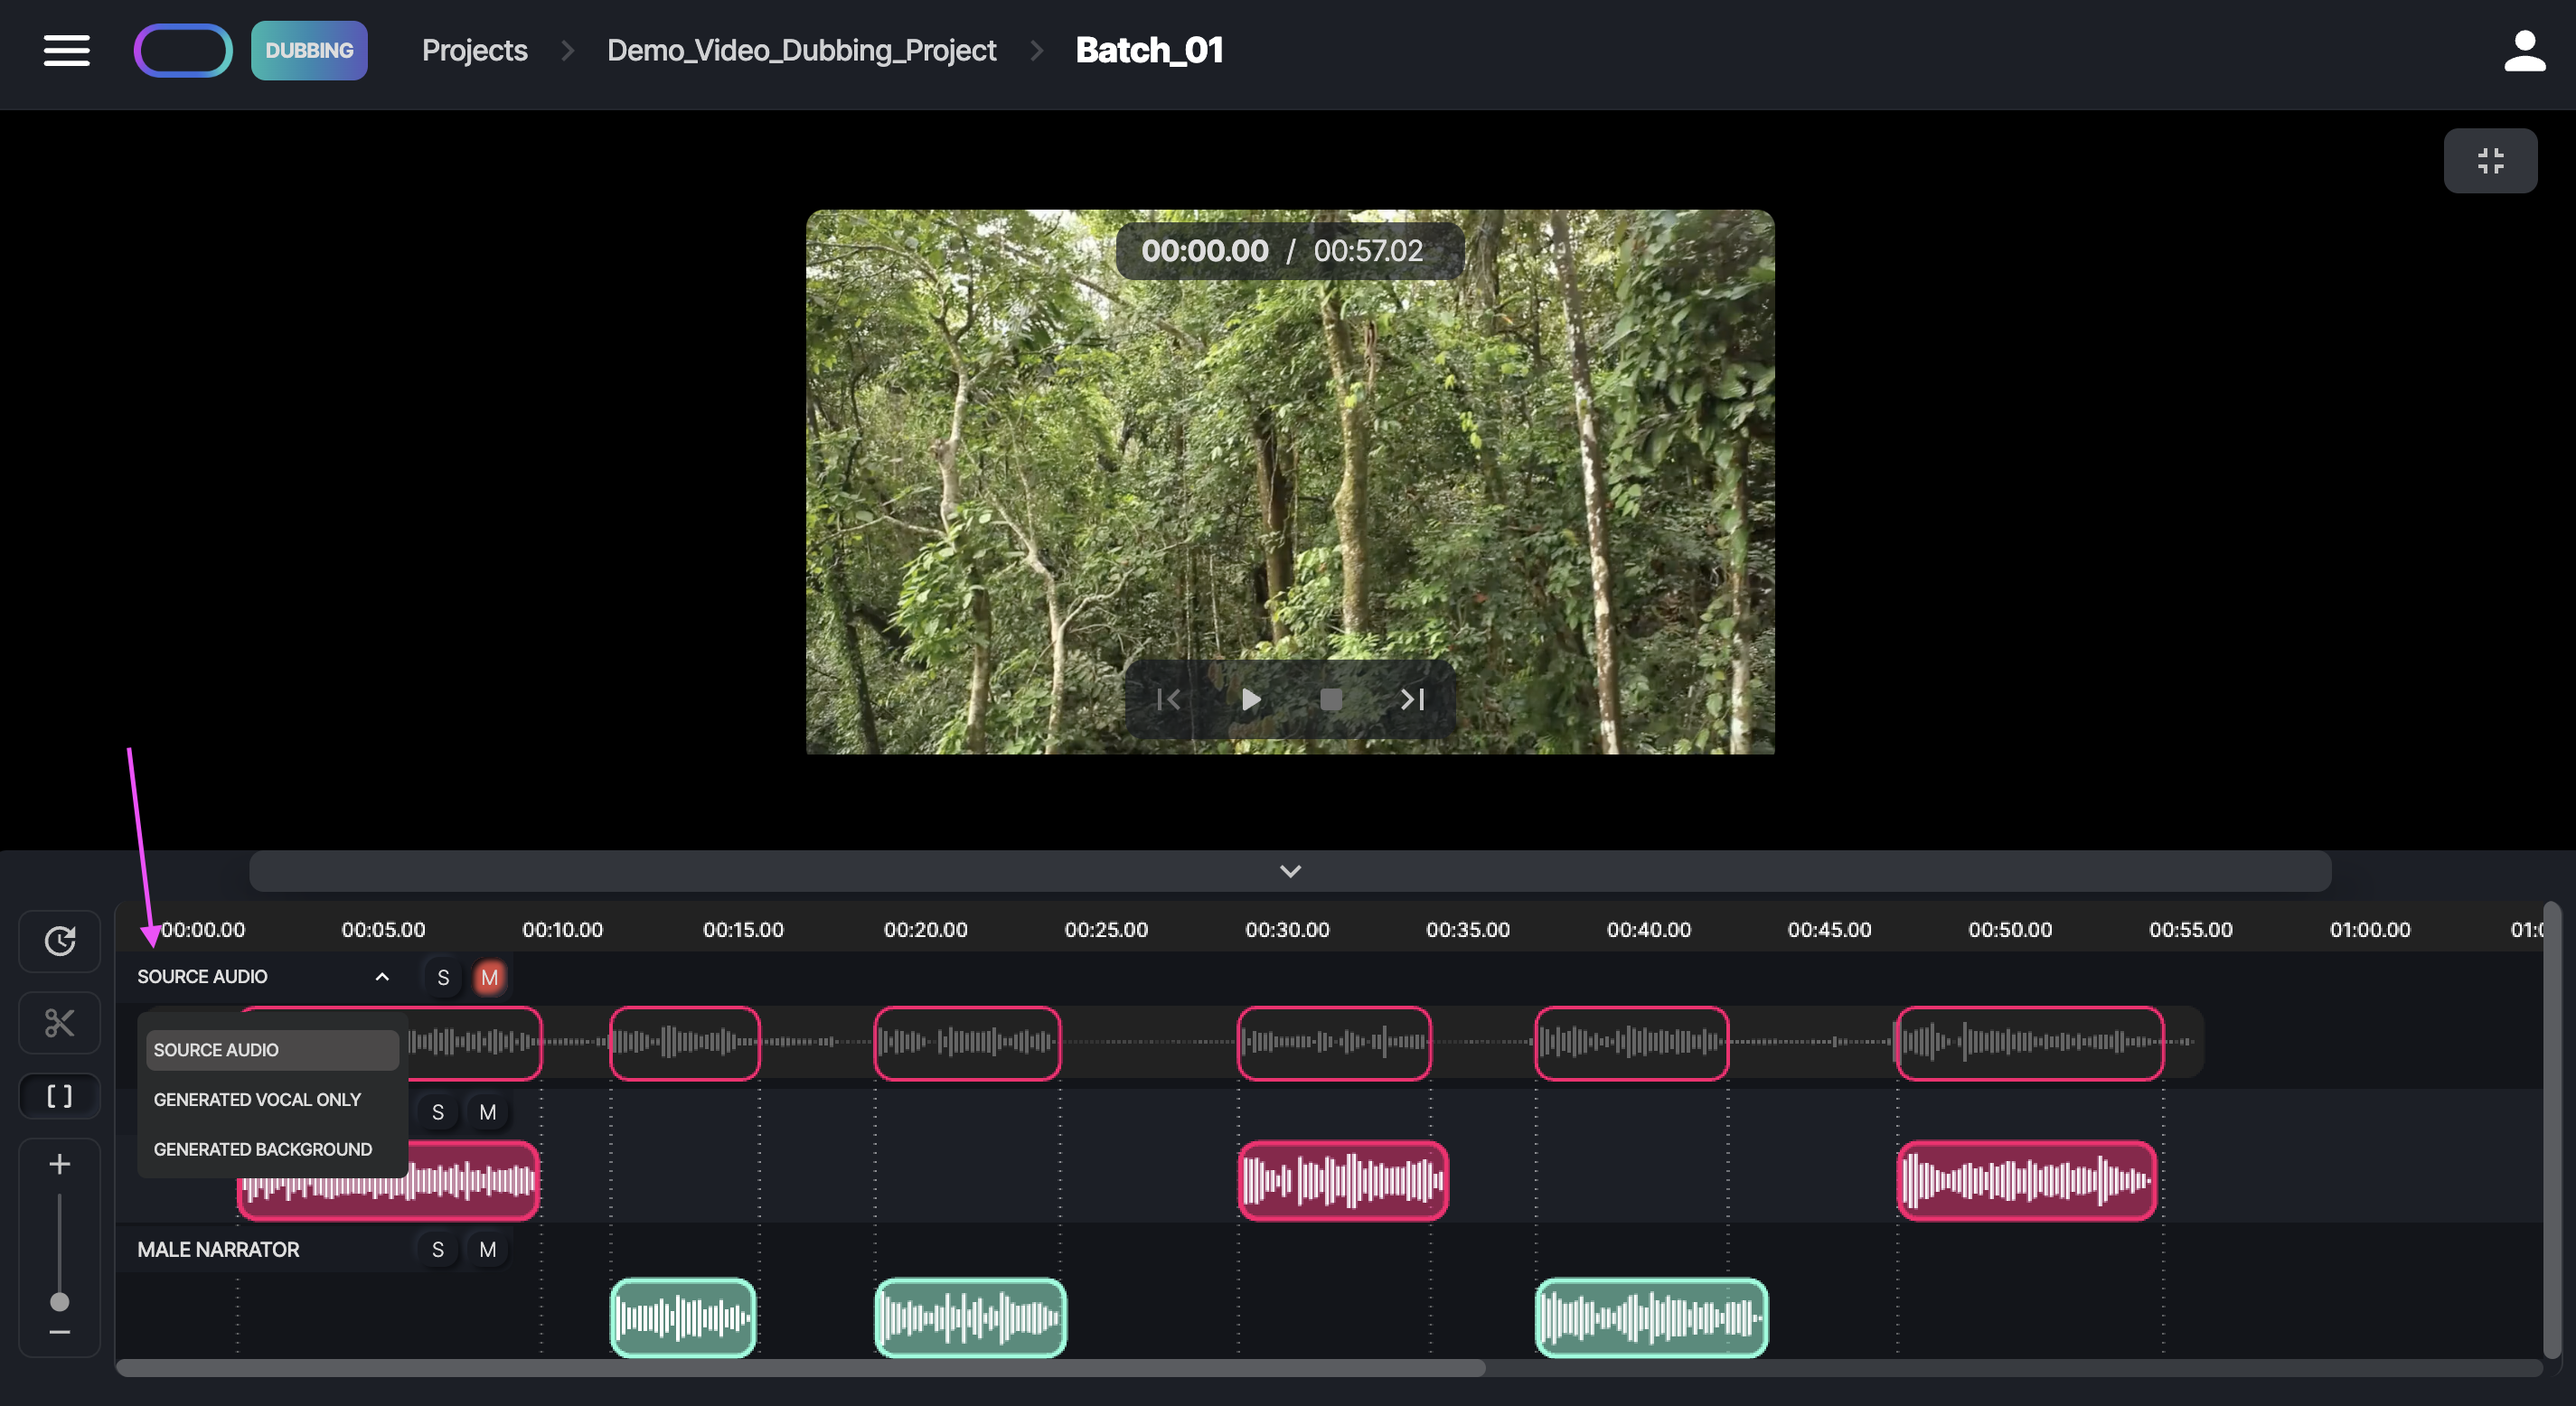
Switching Between Different Source Tracks
If you've uploaded additional audio tracks—like background music or vocal-only tracks—to the Source Media folder in the Asset Management page, you can switch between them in the timeline, as shown in the screenshot below.
When you're satisfied with the result, you can approve each line individually by clicking on the  button. Alternatively, you can choose multiple lines or all lines, click on Actions, and then choose Approve Selected. The lines will be moved from Ingested to Approved. Any project-level role (Project Owner, Project Manager, and Project Editor) can approve a line. The line will simply be moved to Approved, and no minutes will be charged.